Creating a customer
Add a customer by hand when someone calls, walks in, or emails before they ever book online. You can also create the record first, then schedule an appointment for them.
Before you start
- Know at least their Name, Email, and Phone - all three are required.
- Prefer the same email and phone they will use on your booking site, so later online bookings match this profile. See How customers are created.
Open the form
- Open Customers.
- Click Add New.
The New customer form opens.
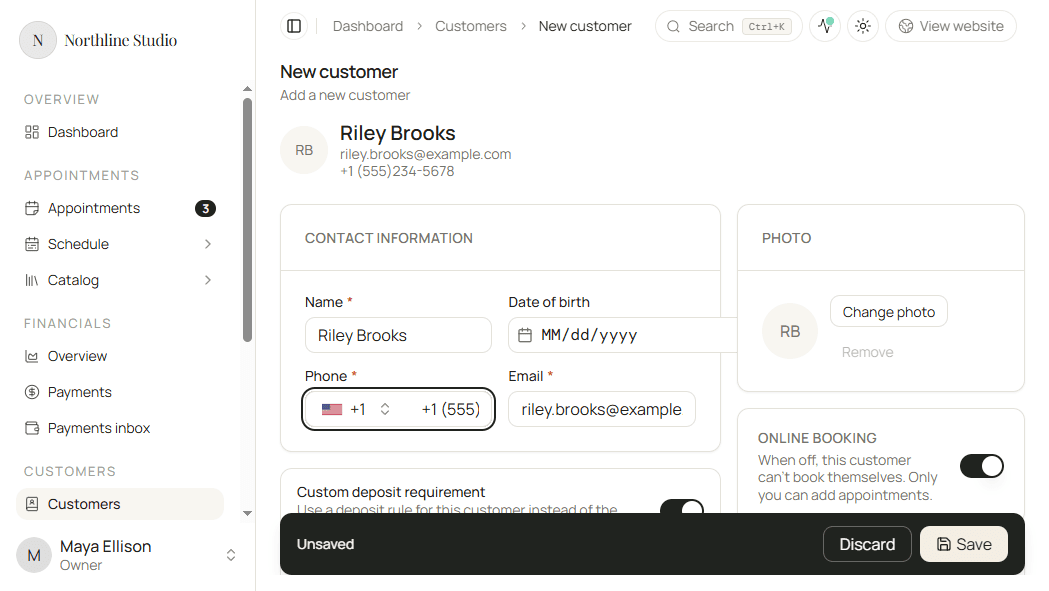
Contact information
| Field | Required | What it is for |
|---|---|---|
| Name | Yes | How the customer appears in lists and messages |
| Date of birth | No | Optional birthday for your records |
| Phone | Yes | Primary phone; used to match online bookings |
| Yes | Primary email; used to match online bookings and send confirmations |
As you type, a summary under the page title shows the name, email, and phone so you can check the record at a glance.
Photo
- Click Change photo.
- Pick an image from your assets (or upload one in the picker).
- Use Remove if you want initials instead of a photo.
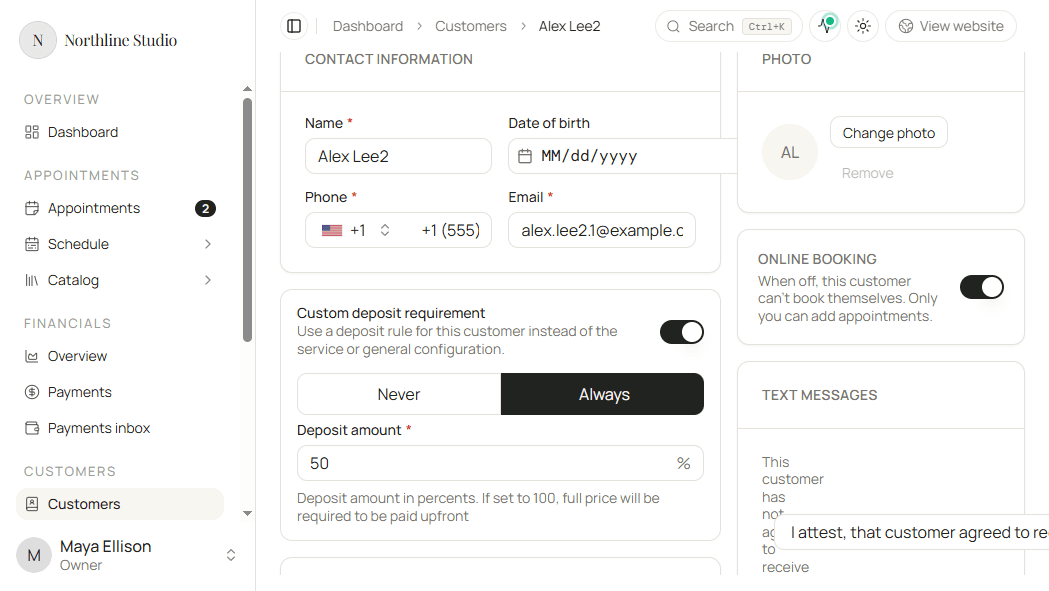
Custom deposit requirement
By default the customer follows each service’s deposit rules (and your workspace defaults).
- Turn on Custom deposit requirement to set a rule for this customer only.
- Choose Never (no deposit for this person) or Always.
- If Always, set Deposit amount as a percent of the appointment price.
100means the full price is due up front.
Notes
Use Notes for private context your team needs (preferences, allergies, how they found you). Only you and your team see notes - clients do not.
Online booking
Online booking is on by default.
Turn it off when this person should not book themselves on your site. You can still create appointments for them in the dashboard.
Also known as
Also known as stores alternate Names, Emails, and Phones this person may use. Hacado uses them when matching a new booking to an existing profile.
- Click Add name, Add email, or Add phone.
- Enter the alternate value.
- Use Remove on a chip to drop one.
You can leave this empty on create and fill it later when you learn a second email or phone. See How customers are created.
Save
- Click Save.
- The customer profile opens so you can add appointments, files, or messages.
If validation fails (missing name, invalid email, or incomplete phone), fix the highlighted fields and save again.
Good to know
- Manual create and online booking use the same matching rules. Reusing the client’s real email and phone avoids duplicate profiles.
- Text message consent is managed on an existing customer’s Details tab after you save (attest or revoke). New customers start without SMS consent until you attest or they opt in on booking.